
If you ever wanted to either farm the Uber Labyrinth or simply wanted a Path of Exile Labyrinth guide (for the first timers or not), we have everything you could ask for right here in one article!
This Path of Exile Labyrinth guide is going to reveal everything about the famous instance and all the trials that you have to go through to get to it.
To kick things off, we are going to start with the very basics and then we are going to dive more into the end-game stuff, such as farming the Uber Labyrinth. So, without further ado, let’s dive right into it!
The Labyrinth difficulties
There are four stages to the Labyrinth, each one of them progressively more annoying and difficult to deal with. However, the more difficult it is, the better the rewards, so that’s why many players choose to actually farm this as an end-game content or simply for the rewards and enchants.
The difficulties are these:
– The (Normal) Labyrinth: the very first player encounter with the Labyrinth, this is where you choose your Ascendancy class and get your very first two Ascendancy Points.
It’s not that difficult if you have a strong char, but if you don’t have gears and go with the intent to finish the first Lab as soon as you unlock it, it might prove a little bit challenging.
– The Cruel Labyrinth: this is the second stage of the Lab, where you get your next two Ascendancy Points. It will be much easier to the player, because by now you will have somewhat decent gears and some more skills to use.
– The Merciless Labyrinth: this is the more budget friendly version of the Lab, which some people farm because you don’t need an Offering to the Goddess, and it gives some decent enchants. It’s somewhat difficult, but nowhere as close as the Eternal Labyrinth.
From this you will get another two Ascendancy Points, and with those your Ascendancy Passives will be almost set in place.
– The Eternal Labyrinth (also known as The Uber Lab): this stage of the Lab is the most nerve-wrecking one, the most annoying and difficult one – but you will have to do it eventually. This gives good EXP for the high levels too (up to a certain level, don’t expect to farm Uber Lab as level 99 and expect to get a ton of EXP) and has the best enchants available (if you’re lucky).
From this stage you will also get your last 2 Ascendancy Points, which will add up to a total of 8 points by now.
The Trials of Ascendancy
This is going to be the player’s first encounter to something that resembles (in the slightest) the Labyrinth. There are a total of 6 Trials in total, but you don’t always have to complete all of them. These trials are located as follows:

The Normal Lab:
– The Lower Prison, Act 1
– The Crypt Level 1, Act 2
– The Chamber of Sins Level 2, Act 2
– The Crematorium, Act 3
– The Catacombs, Act 3
– The Imperial Gardens, Act 3
The Cruel Lab:
– The Prison, Act 6
– The Crypt, Act 7
– The Chamber of Sins Level 2, Act 7
The Merciless Lab:
– The Bath House, Act 8
– The Tunnel, Act 9
– The Ossuary, Act 10
The Eternal Lab:
These trials can only be found in maps, and they spawn randomly. They can be somewhat “forced” to spawn with the prophecy “The Dream Trial”, but may not trigger in the first map that you open (after all, it’s all dependent on RNG).
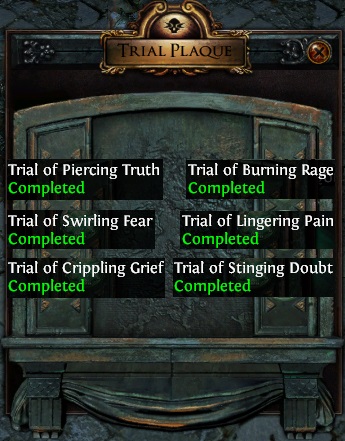
– Trial of Piercing Truth
– Trial of Swirling Fear
– Trial of Crippling Grief
– Trial of Burning Rage
– Trial of Lingering Pain
– Trial of Stinging Doubt
To further help you find trials there is also an in-game communication channel dedicated to finding these trials and much more (such as running Breachstones lately), and this is “/global 820”.
By typing that into the in-game chat, your Global channel will switch to the respective one, and that’s where people share the Trials of Ascendancy for the Eternal Lab that they’ve found.
The hidden rooms within the Labyrinth
As you will open the Lab, you will often miss out on some of the secrets this Labyrinth has. There you can find some hidden treasures, some secret passages and even extra Treasure Keys. You will most likely never find these rooms around the doors leading to other rooms, but rather by exploring the whole map.
The secret room
For this room you need to keep your eyes on the minimap (I suggest keeping it on the top-right corner in case you’re not doing so already), and looking at the available entrances.
If you see that next to your character there is a wall, but further behind there is still room to explore, then you’ve found it.
It can be activated by pulling a switch and when doing so, there will be a passageway opening through the wall that will reveal to you the certain room.
Usually this room contains a Shrine (more details below) that will give you some buff which will make the Lab run much smoother, or even allow you to skip to the next Izaro fight.
The secret passage
You will find this usually within the Iron Maidens or Sarcophagus or so, and this will allow you to travel a distance without actually going through the troubles of walking all that way. It will NOT get you past Izaro, so don’t even think about that.
The chest room
By finding and pulling the switch to this room, you are going to find a hidden room containing a Labyrinth Trove.
This is going to drop any item that can be found in the chests at the end of the Lab which you open with a Treasure Key, but it doesn’t require one to open. It can be either super valuable, or complete trash (in my experience kinda useless).
This room will be shown the same on the minimap as the one mentioned earlier, and that means you will notice that there is something to explore on the minimap, but you cannot access it by simply walking there. Once you pull the switch, a passage will open and will grant you access to the Labyrinth Trove.
The trap wall
This is basically another switch (what a surprise!) that can be found between traps (usually the spikes in the ground) and once you pull it, it’s going to drop a large wall and enable access to another location within that room.
The moving statue
This can only be found outside, in the Domain Enclosure, and it can be moved in order to reveal a secret passage that leads to the Basilica Annex. Works if you want to finish the Lab quick.
More Treasure Keys? (Plus the not so little pet Argus)

In this section I will write all the possible ways of getting Treasure Keys, including the ones from Izaro.
– When fighting Izaro, he will always drop at least 1 Treasure Key. If you don’t kill him quickly and rather let him have multiple traps at once, the encounter will get more difficult and he will drop additional keys.
I have found that the more difficult the fight proves to be, the more keys he will drop, up to a maximum of 3 Treasure Keys.
– You can look for Argus, which is Izaro’s “beloved” pet cat (no, not the cuddly ones you might imagine), which will always drop 1 Treasure Key. Argus can be found behind a door that has a slight green glow to it once opened, and doesn’t require any keys.
– When opening a Curious Lockbox you will get 1 Treasure Key. This can be found by solving puzzles throughout the Lab or by passing through various traps in order to get to it.
– You can activate the prophecy “The Emperor’s Trove”, and that will make Izaro drop an additional Treasure Key when defeating him (along with the ones he will normally drop).
– The chests at the end of the Lab which can be opened with Treasure Keys, can drop additional Treasure Keys if you are lucky enough.
– You can get lucky when touching a Mysterious Darkshrine and force Izaro into dropping an additional Treasure Key when defeated, along with the ones he normally will drop (plus the others that you might find along the way or with prophecy).
Silver Keys and Silver Doors

The Silver Keys can be found in the Lab usually behind lots of well-assorted traps, and they can be used to open additional instances within the Labyrinth, which can only be accessed through the Silver Doors. A Silver Key will open a Silver Door, and you can’t use one key to open multiple doors.
They aren’t mandatory in passing the levels, but can contain useful items (or complete trash). Behind the Silver Doors, you will find Silver Caches or Mysterious Darkshrines.
Gold Keys and Gold Doors

The Gold Keys are a whole other story than their Silver brethren. The Gold Doors are usually a stage that you have to pass through in order to progress through the Labyrinth. To pass through the Gold Door, you will have to search for the “Annex” which contains its Gold Key that is required to open it.
The Gold Key is also usually behind lots of traps, usually within a single room designed specially for that Key, and has no other exits. By opening the Gold Door you can continue to progress through the Labyrinth. A Gold Door can only appear once within the Labyrinth, while there can be multiple Silver Doors.
The Mysterious Darkshrines
There are four total Mysterious Darkshrines in every Lab run, and these can be used to gather super beneficial buffs. These buffs last for as long as the Lab lasts, and aren’t timed like the ones you find in a map. They are as follows:
– “Be twice blessed”: You will get an extra use of the Divine Font (you can enchant again).
– “To the worthy go the spoils”: Izaro will drop an additional unique item at the end.
– “Discover what lies within”: Izaro will drop an additional Treasure Key.
– “Movement ceases, tension mounts”: Traps will be disabled in the final encounter.
– “The heart quickens, the blood thickens”: Players take 50% reduced damage from traps.
– “Restore that which was lost”: Players have increased Life (or Energy Shield) and Mana recovery.
– “Courage stands tall“: Players have increased Size, Area of Effect and Life.
– “None shall stop you”: Players have increased Armor, Evasion and Energy Shield.
– “Deliver pain exquisite”: Players always deal Critical Strikes.
– “Hit hard. Hit once”: Players have increased damage.
– “Death doesn’t wait”: Players have increased action speed (movement, attack, projectiles).
– “A portal to Izaro appears”: A portal opens to the next Izaro (as the name implies).
How to do Labyrinth properly
The best way to do Lab if you want a quick run, is to always try and stick to the right side of the map. The correct path to Izaro encounters will usually be found by going this way, but if you want to look for the chests or keys, they aren’t going to appear here guaranteed. So for a quick run, sticking to the right side is good. But for the full run, with all chests opened and all rooms cleared, it’s not going to be the best.
If you are looking to do this, you might also want to set your Pantheon to Soul of Ralakesh (minor god) for the decreased bleeding damage, since there are many traps that trigger a super annoying bleed which can drive you crazy. As for the major god, either Soul of Arakaali or Soul of Lunaris will do, your choice.
Another thing I suggest for those of you who are doing Life builds, is keeping an extra Life flask with you (at least one flask) and have something to remove bleeding. It can be super useful when you want to face tank the traps and keep moving forward even when getting hit by them.
Also, if you are carrying someone throughout the Lab, they don’t have to be in the same room as Izaro during the fights! They can just wait behind the door while the boss is getting killed, and simply join the room after (in case you want to be extra careful).
These are all the Path of Exile Labyrinth tips I can think of at the moment, but if you know some other useful stuff, leave them down in the comments below!
- Rise of Kittens Tier List & Best Cat Lineup - February 5, 2025
- Whiteout Survival Pets Guide - January 23, 2025
- Whiteout Survival: Best Heroes in the Game (Tier List) - January 22, 2025
A very good article gave me a lot of information about Labyrinth, which was of great help to my path of exile.
A very great article gave me a whole new lot of information about Labyrinth which was of greatest help to my path of exile!